ManicureFX
UV Lamp For Gel Nails
UV Lamp For Gel Nails
Couldn't load pickup availability
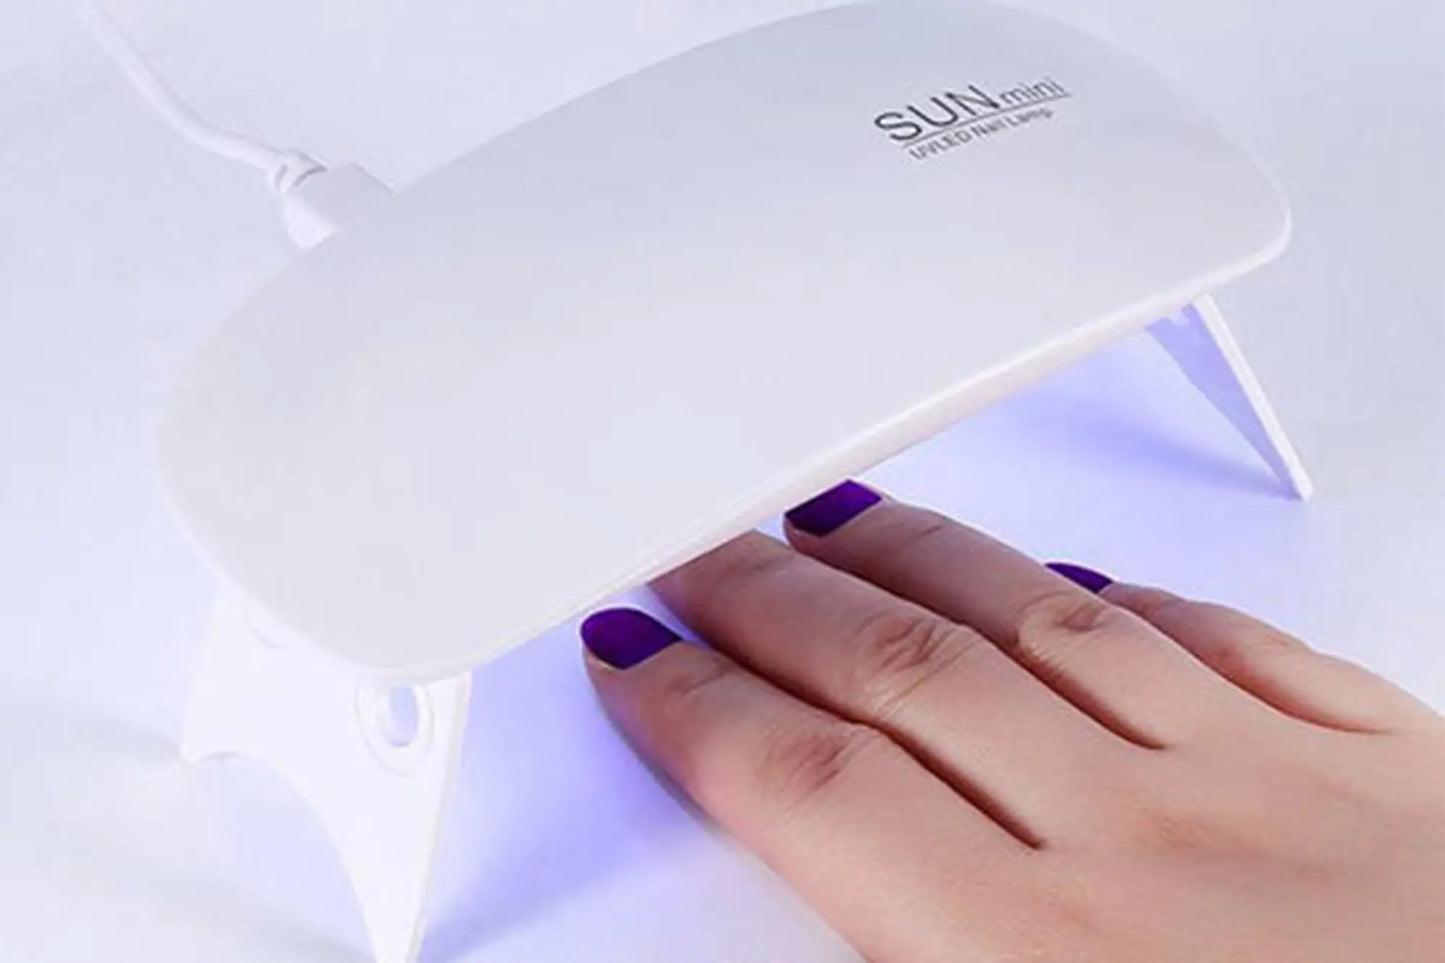
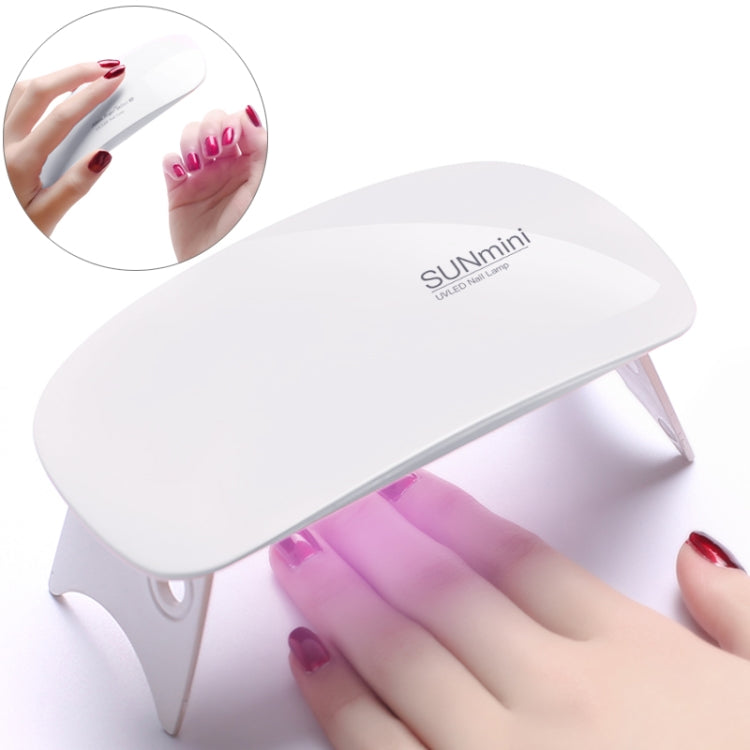
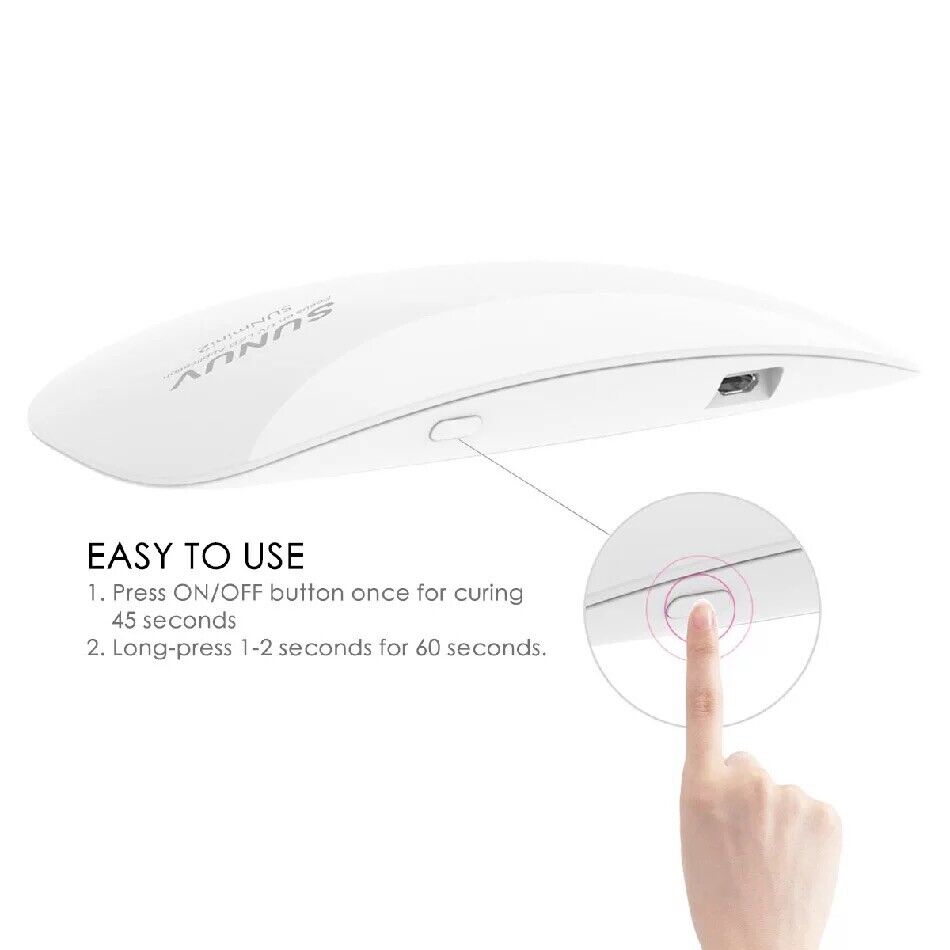
Professional Mini UV Lamp with LED Lights: Ultimate Gel Nail Polish & Gel Wrap Curing Solution.
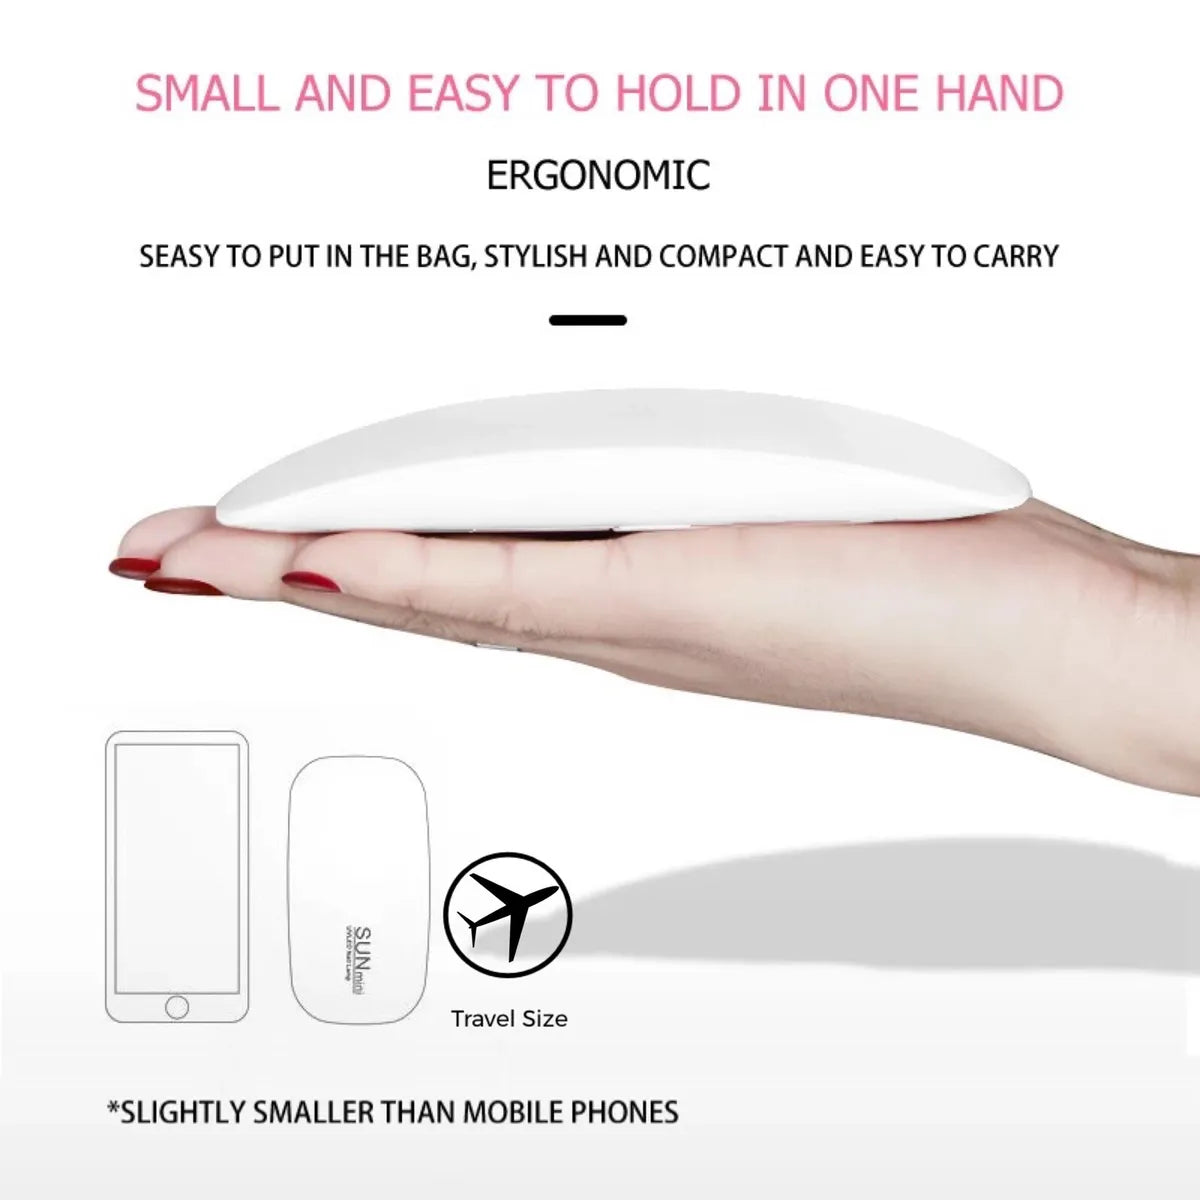
Our mini SUN UV nail lamp sometimes also called nail dryer for gel nails offers an unparalleled combination of efficiency, design, and technology to cater to both professionals and home enthusiasts. Equipped with advanced UV LED lights, it delivers fast and even curing of gel nail polish and nail polish wraps made from gel material. Its adjustable settings and timer functions ensure the perfect finish every time, while its ergonomic design provides comfort and ease of use. With safety features that protect the skin and eyes, it is the best UV nail lamp and a must-have tool for anyone looking to achieve salon-quality nails from the comfort of their home.
LED vs UV Light For Nail Lamp.
UV (ultraviolet) lamps and LED (light-emitting diode) lamps are both used for various applications, including the curing of gel nail polish. However, they differ in several key aspects:
Light Source:
UV Lamps: These use ultraviolet light, which falls in the UV-A spectrum. This light is what cures gel polish and can also be used for other UV-reactive applications.
LED Lamps: LED lamps use diodes that emit light when current flows through them. They can be designed to emit UV light or visible light, depending on the application.
Curing Time:
UV Lamps: Typically, UV lamps take longer to cure gel polish, usually around 1-3 minutes per layer.
LED Lamps: LED lamps cure gel polish faster, often in just 20-30 seconds per layer, due to more efficient energy usage.
Energy Efficiency:
UV Lamps: Generally less energy-efficient and can get quite hot during prolonged usage.
LED Lamps: More energy-efficient, cooler to the touch, and often last longer.
Bulb Life:
UV Lamps: The bulbs in a UV lamp have a shorter lifespan and may need to be replaced more frequently.
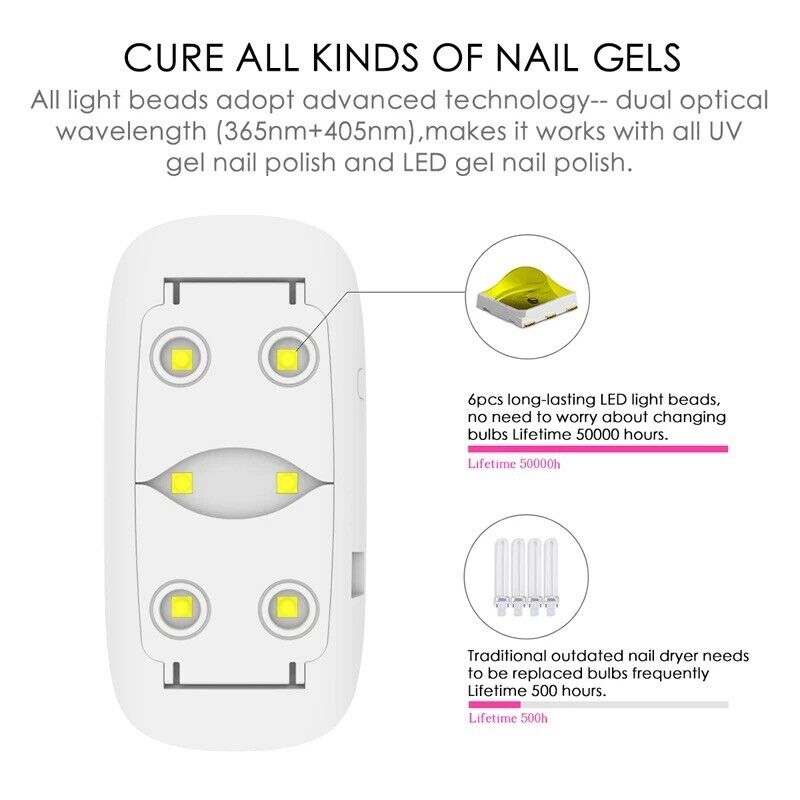
LED Lamps: LED lamps last much longer, sometimes up to 50,000 hours or more, and often don't require replacement.
Health and Safety:
UV Lamps: Prolonged exposure to UV light can be harmful to the skin and eyes, so proper care and protection are necessary.
LED Lamps: Generally considered safer as they don't emit the broader range of UV wavelengths that traditional UV lamps do.
Price:
UV Lamps: Often less expensive initially but may require more maintenance and bulb replacements.
LED Lamps: Tend to be more expensive upfront but are more cost-effective in the long run due to energy efficiency and longevity.
Can I Use A UV Lamp For Resin Curing?
Yes, UV lamps can be used for curing resin, and in fact, they are commonly used in various applications for this purpose.
Best UV Lamp For Gel nails
Selecting the best UV lamp for gel nails demands a thorough consideration of efficacy, convenience, and safety features. The perfect lamp should offer substantial power to ensure a quick and even curing process for a variety of gel nail polishes. In addition, it should come equipped with multiple timer settings to accommodate different gel formulas and to prevent overheating, which helps in protecting the health of your nails. Ergonomic elements such as a comfortable hand rest and a spacious interior can enhance the nail curing process significantly. Opting for a UV lamp with a smart sensor can revolutionize your manicure experience, enabling a hands-free operation that automatically starts and stops the curing process when your hand is inserted or removed. Lastly, investing in a UV lamp that stands the test of time in terms of durability and reliability will serve as a valuable asset in your gel manicure toolkit.
Best UV Light For Gel Nails
In the pursuit of the ideal UV light for gel nails, the comparison between LED-based lamps and traditional UV lamps is inevitable. The advantages of LED lamps are quite pronounced, offering a significantly faster curing time that usually ranges from 30 seconds to a minute per layer, as opposed to the longer durations associated with traditional UV lamps. This swiftness not only saves time but can also contribute to a smoother and more enjoyable manicure experience. Furthermore, LED lamps are known for their remarkable lifespan, functioning efficiently for several years without the necessity for bulb replacements, thus presenting a cost-effective solution in the long run. While traditional UV lamps might come at a lower initial cost and offer a broader UV spectrum, their benefits seem to be overshadowed by the efficiency and modernity of LED lamps. Therefore, for those seeking a superior, time-saving, and economical choice, LED-based lamps emerge as a clearly better option.