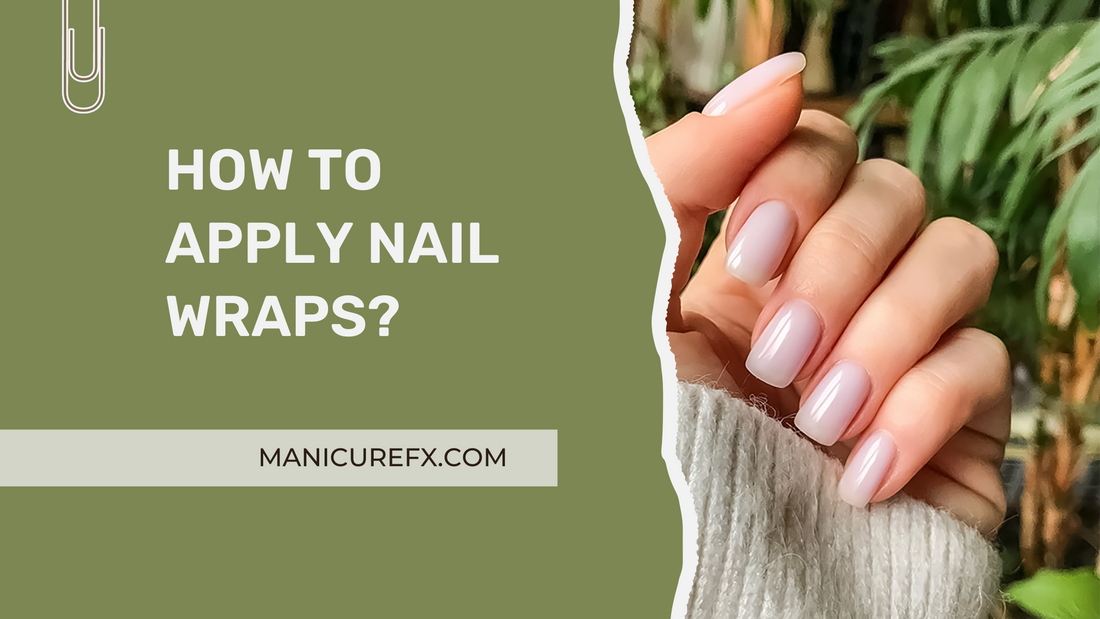
To apply nail wraps, first ensure your nails are clean and dry. Push back your cuticles and gently buff the surface of your nails. Peel the nail wrap off its backing and position it onto your nail, starting at the cuticle line. Smooth it onto your nail, working from the base to the tip. Use a nail file to remove any excess.
!! BONUS TIP 1 !! Apply Before Bed Time. It gives good time for the wraps to make a bond with the nail surface and will last longer. And make sure you do not use lotion before or after the application that day on your hands as it will prevent the wraps to adhere properly.
!! BONUS TIP 2 !! Apply Base Coat. Although not needed but if you feel that your nails surface is sensitive to the adhesive then to protect your top nail surface you can use base coat on the nails before applying nail wraps. This helps in 2 ways one it protects your nail surface and secondly it may help to stick better the nail wraps. Just make sure that the base coat is fully dried before application of the nail wraps.
Please read below the simple instructions and also watch the video instructions at the bottom of the page about how to use and put on nail wraps.
Step 1. Wash Hands.
Often overlooked but very important step of the application is washing the hands before using the nail wraps. Our hands have oils that prevent the nail wrap to stick properly on to the nails as the oil comes in contact with adhesive. For a good application that goes on for days always clean and wash your hands with soap before application.
Step 2. Buff Nail Surface Slightly (Optional).
Buffing your nail surface helps for people who experience issues with nail wraps not sticking to your nails or sticking to some nails and not to other. It is because some nails have small bumps and irregular surface or some people have natural very shiny nail surface that causes the wrap to not stick properly and fall off. In case you have issues then buffing the nails before application helps.
Step 3. Use Alcohol Swabs Provided To Clean Nails.

This step is in conjunction to the previous step to further clean your nail before putting on the nail wraps. This ensures proper sticking of the nail wrap and it will not fall off.
Step 4. Choosing The Right Size.

This is also an important step. Always select a nail wrap that is one size smaller of the width of the nail you are picking for. If your nail wrap is bigger it will touch the skin and it will not form a complete seal and the nail wrap will not stick properly and fall off much earlier than it is supposed to.
Step 5. Remove Plastic Clear Cover.
There is a thin plastic clear coating on the wraps. Please remove the coating first. This coating is there to protect the nail wraps.
Step 6. Peel The Nail Wrap From Top Side.
Carefully peel from the top side of the nail wrap. This side will be filed away as the length of the wrap is bigger than the nails.
Please be careful not to touch your skin/hands to the adhesive side as it will reduce the stickiness of the wrap.
Step 7. Place The Nail Wrap On To The Nail.

Align the bottom of the wrap just below the cuticle and use your other finger to gently press and stretch the wrap to remove any bubbles.
It take some practice so give yourself some time to adjust with it and in couple of attempts you will become a pro :) guaranteed.
Step 8. File Excess.

Use downward motion of the file provided to remove the excess nail wrap.
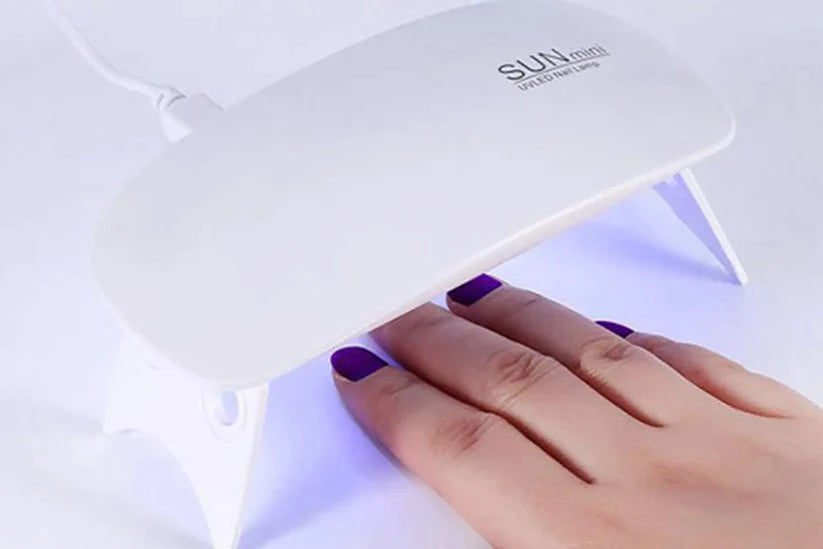
Extra Step For GEL Wraps Cure For 60 Sec to 120 Sec
Step 9. Apply Top Coat (Optional)
ManicureFX nail wraps are high quality wraps that do not loose their gloss or shine even wearing days after days. The top coat is not needed for that purpose.
But if you want to extend the life of the wrap you may apply a top coat. it is not required and is an optional step if you want to prolong the length of the stickiness of the wrap. Note: some top coats make the nail wrap to shrink a little but most of the top coats go fine with them. You will need to experiment which top coat goes well with the nail wraps.
Step 10. Avoid Water To Hands For Few Hours.
The first 2 or 3 hours after you put on the nail wraps are important as in that time the adhesive is still bonding to the nail. Please avoid going to shower or any activity that exposes hands to water in the first 2 to 3 hours.
How To Remove.
- Slightly raise a corner of the nail wrap with cuticle stick and gently peel off to remove. If the adhesive is still very strong then soak nails in warm water for 3 - 5 minutes to loosen the adhesive and then remove.
- Gently peel the nail wraps.
- Wipe any residual adhesive with soapy water.
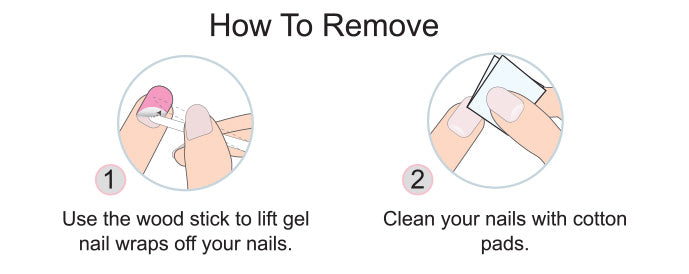
How To Remove GEL Nail Wraps
Removing UV Cured GEL Wraps is easy. Just use any nail polish remover / oil drop on one side of the nail as shown below and lift the wrap with the bamboo stick provided until all of the adhesive and wrap is removed. Use more oil / remover if needed.
Read Below FAQ About How To Apply Nail Wraps.
This video below demonstrates the process of nail wrap application
Do I need to apply nail polish before putting nail wraps?
You do not need to apply nail polish before putting on nail wraps. However, make sure your nails are clean, dry and free of oils to ensure good adhesion.
Can you put base coat on before nail wraps?
It's not necessary to apply a base coat before nail wraps. However, using a base coat can provide additional strength to your nails and may help the wraps stick better.
How to apply nail wraps with gel?
To apply nail wraps with gel, first apply a base gel coat and cure it under a LED/UV lamp. Then, apply the nail wrap as usual and finish off with a gel top coat, curing it once more.
How to apply nail wraps on acrylic nails?
For applying nail wraps on acrylic nails, ensure the acrylic surface is smooth and devoid of oils. Then, proceed with the standard nail wrap application process.
How to apply nail stickers?
To apply nail stickers, first clean and dry your nails. Remove the sticker from its backing and apply it onto your nail, smoothing out any wrinkles. Seal it with a clear top coat.
How to apply foil nail wraps?
Applying foil nail wraps involves a similar process to regular nail wraps. Clean and prep your nails, apply the wrap carefully to avoid creases, and then file off the excess.
What is the best way to apply gel nail strips?
The best way to apply gel nail strips is to start with clean, dry nails. Apply the strip carefully, smoothing it out as you go. Then, cure it under a LED/UV lamp.
Should you use a base coat with gel nail strips?
While it's not necessary, a base coat can provide additional strength and a smoother surface for gel nail strips.
What is the best base coat for nail wraps?
The best base coat for nail wraps is a clear, quick-drying one. It should provide a smooth surface and enhance the stickiness of the wraps.
Can I put a gel top coat on nail wraps?
Yes, you can put a gel top coat on nail wraps. This can add shine and protect the wraps from chipping.
How do you apply nail wraps without bubbles?
To apply nail wraps without bubbles, start applying at the base of the nail and smooth the wrap out towards the tip. A rubber cuticle pusher can help press out any bubbles.
How to apply nail wraps on short nails?
Applying nail wraps on short nails involves the same process as regular nails. Choose wraps of the correct size and file off any excess carefully.
Why won't my nail wraps stay on?
If your nail wraps won't stay on, it could be due to oils on your nails. Make sure to thoroughly clean and dry your nails before application. If problems persist, consider using a base coat or a different brand of wraps.
Read More Blogs:
- Maximize Your Manicure: Proven Tips for Longer-Lasting Gel Nail Strips
- Fiberglass Nail Wraps: Everything You Need to Know
- The Beginner’s Guide to Nail Wraps: Everything You Need to Know
- Gel Nail Wraps 101: A Beginner's Guide to Flawless Nails
- Silk Nail Wraps And Extensions: Everything You Need To Know